Starlink - Fixed installation of the standard antenna (Part 2)

last updated on June 13, 2023

About five weeks ago we modified the Starlink standard antenna and installed it flat on the roof of our four-wheel drive motorhome, see Starlink - Fixed installation of the standard kit antenna in the motorhome. Since then we have gained valuable experience and have been able to make improvements based on it.
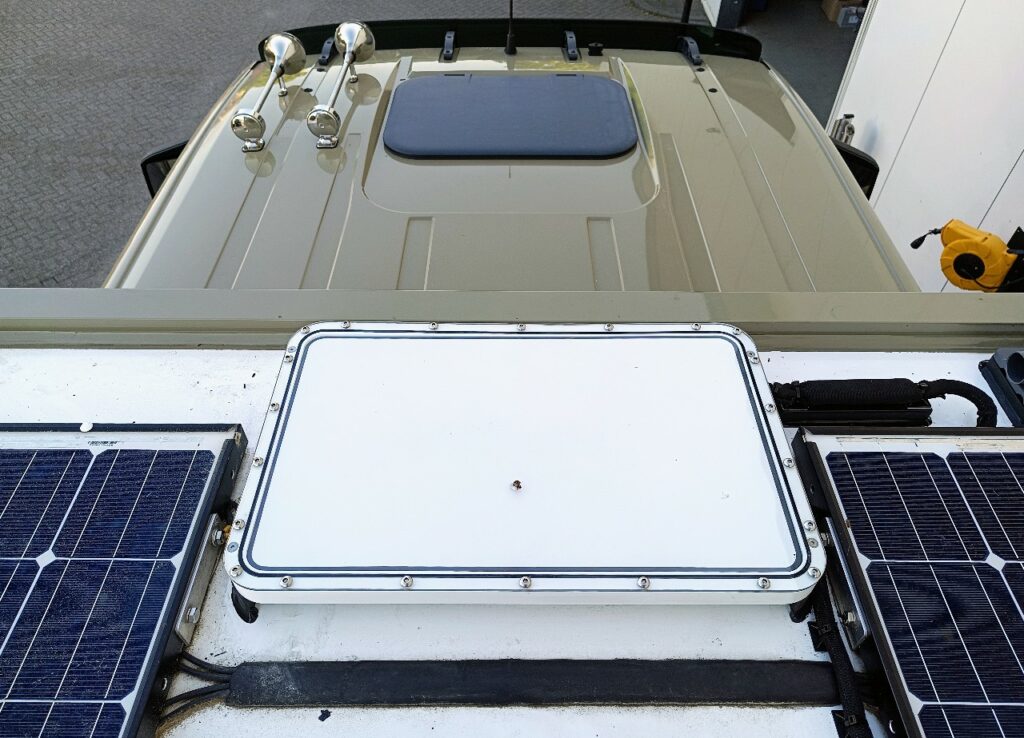
The proprietary Starlink STX connector connections do not seem to be sufficiently waterproof (also reported in a similar way in various places on the Internet). Apparently, moisture got into the plug connection and caused problems up to the total failure of the system about three weeks after commissioning.

  • Accordingly, the male/female STX connectors have been removed.
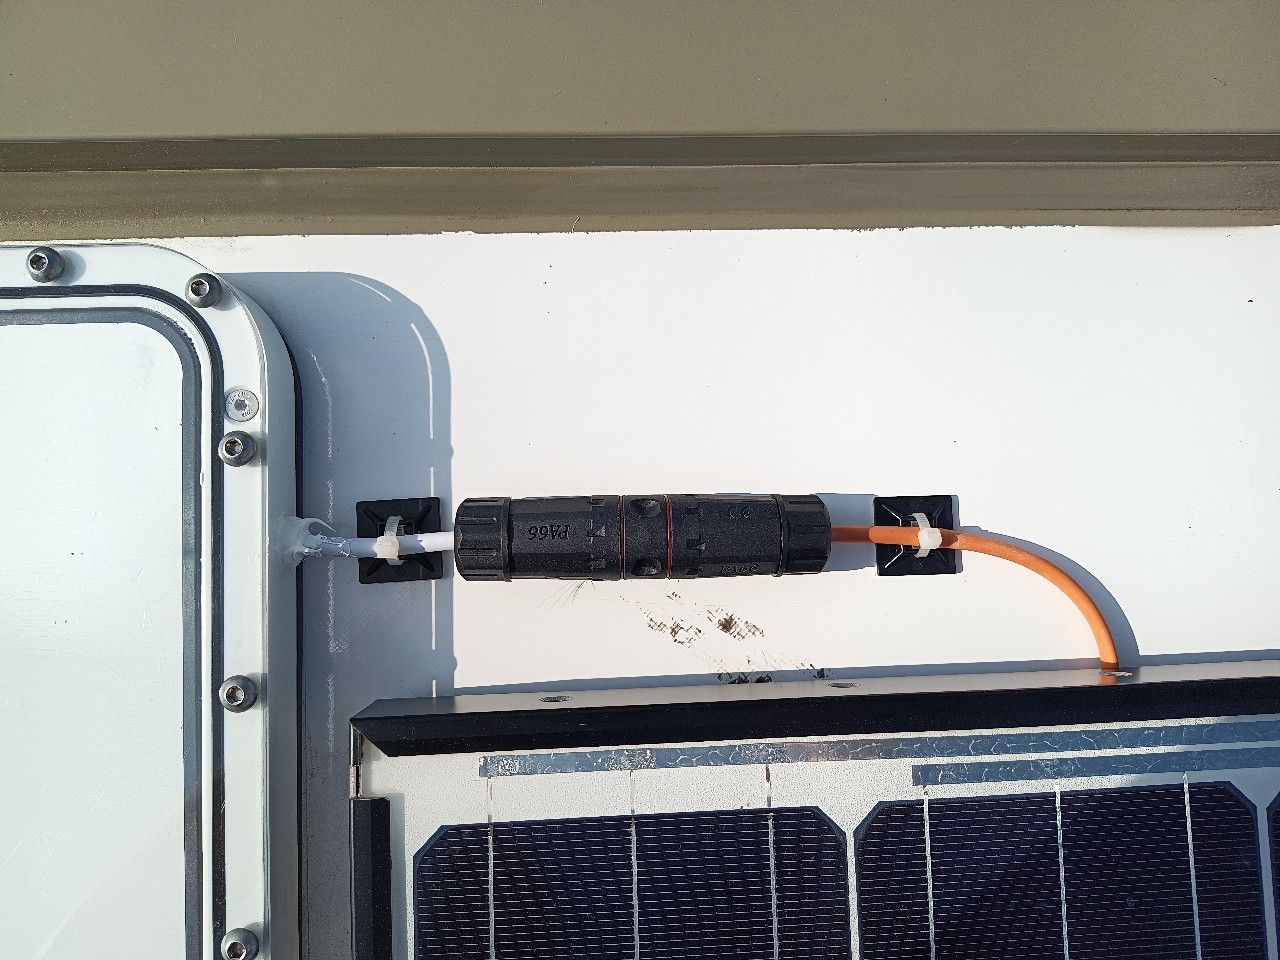
  • The original dark gray Starlink cable has been replaced with a weatherproof/UV resistant Ethernet cable with RJ-45 connector assemblies.
  • The new Ethernet cable was no longer glued to the roof, but mounted with cable ties in such a way that it could be replaced more easily if necessary.
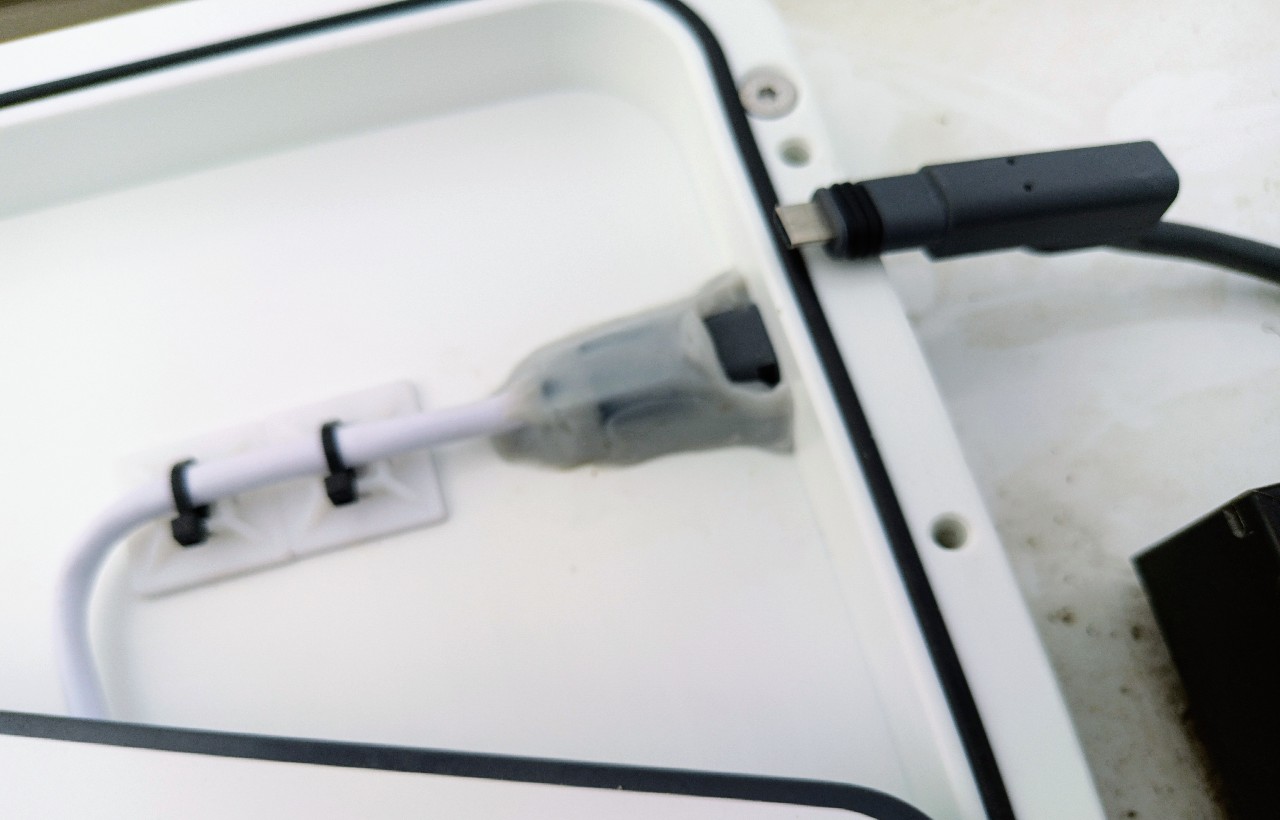
  • An RJ-45 plug was crimped to the Ethernet cable of the Starlink antenna (with Starlink pinout) and both plugs using one waterproof RJ-45 connector connected with each other.
  • The connector was provided with an additional protective hose and like that Starmount itself also mounted 30mm higher above the roof.
  • The hole in the Starmount with the white ethernet cable that was now fed through was closed with a Fischer sealing adhesive sealed.
The modifications made have several advantages:

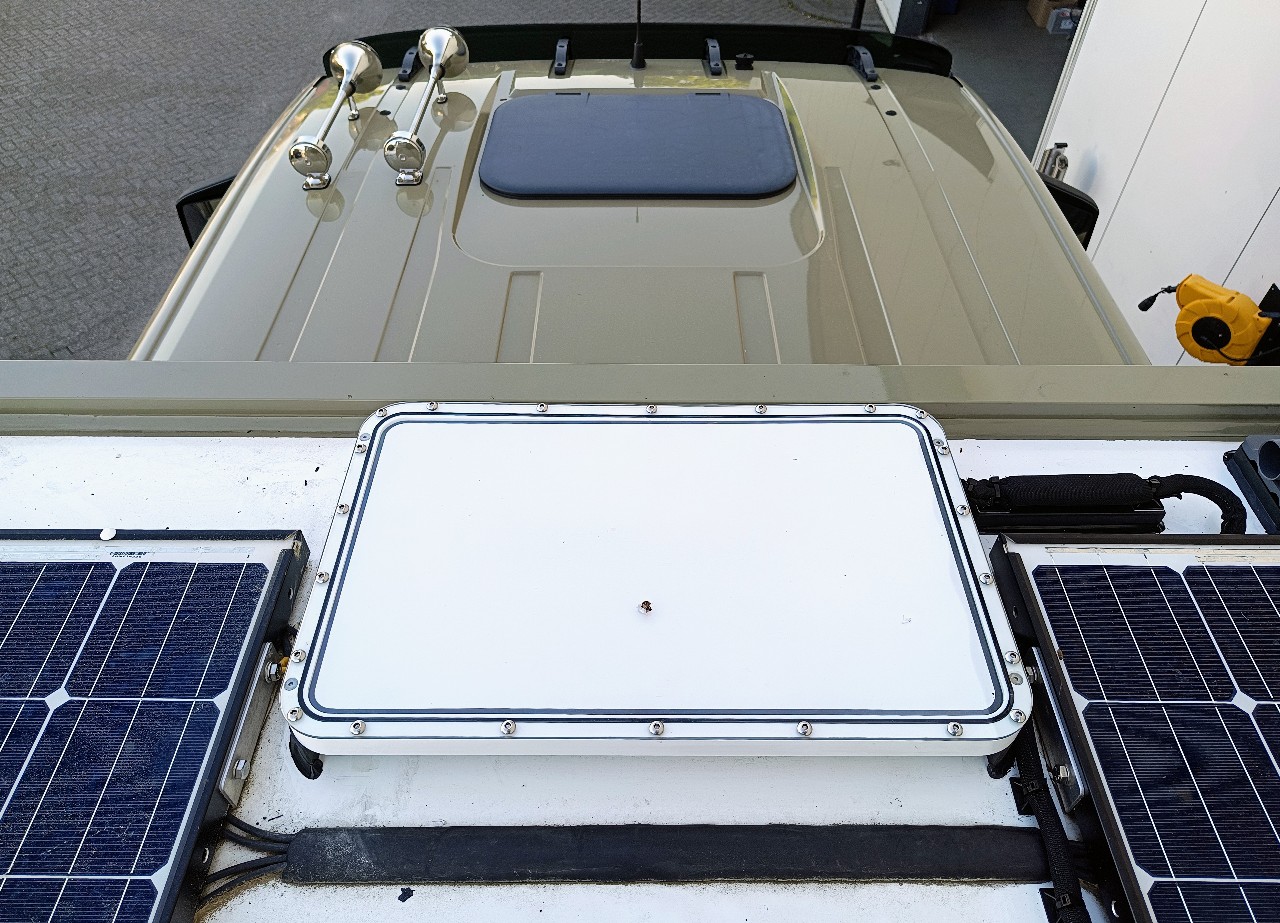
  • Due to the 30mm higher mounting, there is now a lower risk that the components on the roof (Starmount with Starlink antenna and cable connection) are "in the water".
  • By using RJ-45 connectors, it is now much easier to test the components for possible faults
  • By using a normal Ethernet cable (significantly cheaper than the original Starlink cable), it can be replaced much more cheaply in the event of a defect.

As part of the improvement measures, components of the previous 24V control of the Starlink antenna were also replaced with better ones, see this post.

The improved system will then be on display in around two weeks at the Adventure four-wheel drive in Bad Kissingen on the status of Bliss Mobil B.V

addendum:
Of course, the findings described above inevitably lead to the desire for a housing with a built-in waterproof RJ-45 coupler for the modified Starlink antenna.
A look at Starmount's website shows that something like this already exists, see "Starmount all in one". Of course, the container with the waterproof connectors would be interesting for the application here, but without the other electronic components.

Comments

5 responses to “Starlink - Fixed installation of the standard antenna (Part 2)”

  1. […] Starlink – permanent installation of the standard antenna (part 2) […]

  2. Paul

    Thank you for sharing the information.

    Since I'm currently trying to build a comparable solution, I have a few questions that you might be able to answer:

    1. How did you set up the Starmount and the waterproof RJ-45 connector?

    2. Did you connect the RJ-45 directly to the cable to the dish within the Starmount, or did you connect an RJ-45 socket/plug combination within the Starmount to be able to route the weatherproof RJ-45 to the outside?

    3. Since I have a vehicle with 12v, unfortunately I cannot use the Victron converter. The antenna provider FTS Henning offers the combination of voltage converter and PoE injector (https://www.fts-hennig.de/netztechnik/netzwerk-zubehoer/dc12-to48v.html). In your opinion, does this fit as an alternative?

    Best regards & have a good trip.

    1. Hello, thanks for the comment! - Here are the answers:
      1. The Starmount and the RJ-45 connector were raised using plastic blocks that were glued to the roof (two blocks for the short sides of the Starmount, one block for the RJ-45 connector). Metal plates with threads to which the Starmount is screwed are stuck to the plastic blocks of the Starmount. The RJ-45 is connected to the plastic block with cable ties.
      2. I routed the RJ-45 plug of the original Starlink Dishy internal Ethernet cable through the hole in the Starmount to the outside and then closed the hole with sealing glue. The cable was then protected on the outside with a protective jacket against UV radiation and other environmental influences. However, I don't think this is optimal https://star-mountsystems.com/products/star-mount-flat-mount-pro but was not yet available at the time. I couldn't find an Rj-45 connector that would have fit sensibly into the star mount under the antenna.
      3. I initially had two DC-DC converters that looked like the one in https://www.fts-hennig.de/netztechnik/netzwerk-zubehoer/dc12-to48v.html – both were defective after a few days. The PoE injector shown there should be checked to see whether it actually supplies the 48V voltage to all 4 Ethernet wire pairs. This is required by the Starlink Dishy, but only a few PoE injectors can do this. Maybe it's better to wait for: https://boondocker.io/ or https://dishypowa.com/ ? – Both are unfortunately not yet available…
      Best regards!

      1. Paul

        Hello,

        Thank you very much for your answer and the further information.

        After your negative experiences with the “cheap” injectors and DC/DC converters, I have now joined you https://dishypowa.com registered for v2 and become part of it at the same time https://boondocker.io/ order for which at least a delivery date has already been announced.
        Until one of the two arrives, I will use the 220v version for better or for worse.

        Best regards & have a good trip

        1. Hello, with pleasure! – Regarding dishypowa v2 and boondocker, I did the same out of curiosity/interest. However, this was months ago and possible delivery dates keep getting postponed (boondocker) or there is little to no news (dishypowa v2). I'm curious to see if and when the products will actually be available/delivered...

Leave a reply

Your email address will not be published. Required fields are marked *

en_GBEnglish (UK)